
Learning to edit pictures online with AI has never been easier. Tasks that once required painstaking manual work in Photoshop — removing an unwanted object from a photo, for instance — can now be done in seconds using AI-powered editing tools. Online photo editing has changed considerably in recent years, with AI-driven tools now serving both professional photographers looking to speed up their workflow and casual users simply wanting sharper social media photos.
How AI Photo Editing Actually Works
Before getting into the how-to, it helps to understand what’s happening behind the scenes. These tools run trained algorithms designed to recognize patterns — faces, objects, lighting conditions, and overall scene composition — much like an experienced photo retoucher would.
What makes this more than simple automation is context-awareness: modern models can distinguish between skin tone variation that’s natural and lighting that genuinely needs correction, or between deliberate artistic blur and an unintentional focus mistake — allowing for corrections that are more targeted than older, one-size-fits-all filters.
Getting Started with Online Photo Editors
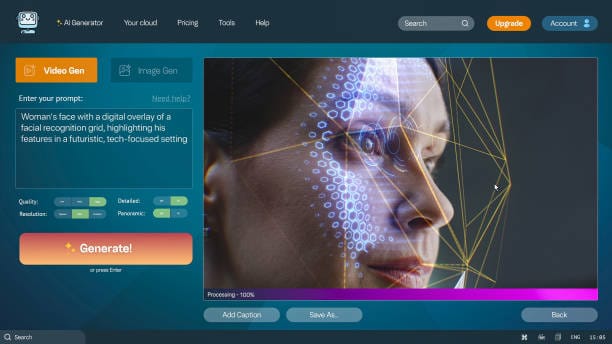
Browser-based editors are appealing mainly for their accessibility — no software download, no subscription required for basic features, and usable from virtually any device with an internet connection. The general workflow across most of these tools looks similar:
Step 1: Choose a Platform
Different tools suit different needs. Canva combines an already user-friendly interface with strong AI features, making it a solid default choice. Fotor offers reliable, straightforward enhancement tools. Pixlr provides more granular manual controls for users who want finer detail. As a general rule: for quick one-click fixes, Canva is hard to beat; for more creative control, Pixlr or Photopea are better suited.
Step 2: Upload the Image
Most platforms accept JPEG, PNG, and RAW formats. One important precaution: always keep the original file untouched and work from a copy. Overwriting an irreplaceable photo without a backup, only to need the original again later, is an easy mistake to make and a genuinely painful one when it happens.
Step 3: Select an Enhancement
After upload, most tools offer a menu of automatic enhancements to choose from — options like auto-enhance, portrait healing, color correction, or sky replacement are common starting points, each targeting a specific type of correction rather than applying a single blanket filter.
Step 4: Apply and Adjust
This is where most editing goes wrong: accepting the AI’s initial suggestion without adjustment. The slider controls exist for a reason — if automatic color enhancement oversaturates an image, dial it back; if portrait smoothing starts looking unnatural, reduce it until skin texture looks realistic again rather than airbrushed.
Practical Use Cases

Background Removal
Once a genuinely time-consuming manual task, background removal is now nearly instant with tools like Remove.bg or Canva’s built-in background remover — useful, for example, for turning a photo taken against a cluttered home office wall into a clean, professional-looking headshot for LinkedIn.
Portrait Retouching
Skin smoothing and blemish removal happen almost instantly. Restraint is the key skill here — pushing a smoothing slider too far quickly makes skin look artificial and waxy rather than naturally clear.
Color Enhancement
Flat, dull vacation photos can be transformed with smart color adjustment — AI models are often able to recognize scene context, such as a beach sunset, and apply corrections tuned specifically for that kind of lighting rather than a generic boost.
Object Removal
An unwanted passerby in an otherwise good photo, or litter cluttering a landscape shot, can be removed convincingly using tools that intelligently reconstruct the removed area based on surrounding pixels and patterns.
Practical Tips for Better Results
A few habits consistently separate a well-edited photo from an over-processed one:
- Don’t over-process. Effects compound with each adjustment — what looks like a subtle improvement one slider at a time can quickly add up to a cartoonish result.
- Check at full resolution. Artifacts and odd blending are often invisible at thumbnail size but obvious once zoomed in — always review a full-size preview before finalizing an edit.
- Work on copies. Losing an original file to an overwritten, over-edited version is a mistake worth actively guarding against.
- Match settings to the platform. A photo destined for print needs different resolution, color profile, and compression settings than one destined for a social media post.
Limitations Worth Knowing
These tools aren’t flawless. Object-removal algorithms still struggle with complex scenes and fine detail — hair masking, for instance, has improved significantly but still isn’t perfect against busy backgrounds.
Creative judgment also remains a human responsibility. AI can optimize technical qualities like sharpness and color balance, but it has no way of knowing whether a photo is meant to feel nostalgic, somber, or bright and energetic — that call still belongs to the person editing it. Privacy is worth a mention too: reviewing a platform’s terms of service before uploading matters, since some services claim usage rights over uploaded images or use them to train their own models.
Final Thoughts
AI has genuinely democratized high-quality photo editing — techniques that once took years of practice to master are now accessible through intuitive interfaces almost anyone can pick up quickly. That said, these are still tools, not a replacement for understanding light, composition, and storytelling. AI editing enhances a fundamentally good photo far more reliably than it rescues one with serious underlying flaws.
Most of these platforms offer a free tier that’s more than sufficient for learning. Experimenting with different tools and settings builds a better eye over time for spotting the difference between a subtle, well-judged edit and an over-processed one.
Frequently Asked Questions
Is AI photo editing free?
Most platforms offer at least a functional free tier. High-resolution exports and batch processing typically require a paid subscription, usually in the range of $5–$15 per month.
Does AI editing reduce photo quality?
It depends on the platform and export settings used. Reputable tools preserve original resolution when exporting in lossless formats, such as PNG.
Can AI fix blurry photos?
AI sharpening can meaningfully improve mild softness, but it can’t reliably fix an image with significant motion blur or one that’s genuinely out of focus. Results vary considerably depending on the severity of the blur.
Are photos uploaded to these tools private?
Privacy policies vary by platform. Reviewing the terms of service before uploading matters, since not every service treats uploaded images the same way — some retain usage rights or use images to improve their models.
What’s the best AI photo editor for beginners?
Canva generally has the gentlest learning curve while still offering meaningful control. Fotor is another easy, beginner-friendly option for quick enhancements.
Can AI-edited photos be used commercially?
Generally yes, as long as rights to the original image are already secured. It’s still worth checking each platform’s specific terms of use before commercial use, since policies vary.
Related Reading
- Removing Background with AI Tools
- How to Upscale Images Using AI for Free
- How to Generate AI Images Without a Watermark